Monday 31 March 2014

Polish Party - Spring

This is a very busy end of the month for me - a blog post pretty much every day, and so much to do at home as well! For this month's Polish Party theme I decided to recreate a manicure by Fia that I saw on G+.

Polishes used: Color Club Lady Holiday, Barry M Key Lime Gelly and Nails Inc Burton Mews

I was unsure about the background colour at first, and was leaning towards a pale nude pink, but in the end the foggy weather we've had here for the past three days made me go with a grey colour that matches the sky and the stones.

Outlined leaves on a foggy sky.


I started with two coats of Color Club Lady Holiday, and once they were dry, I used my detail brush to draw on the leaf bobs with Key Lime Gelly. It was fairly thick, so while it provided good coverage, it was also a bit fiddly to apply - it may be in need of a few drops of polish thinner. Once the leaves were dry, I added the outlines and stems with the dark green Burton Mews.

Leafy tips
This was much trickier than I thought - getting the stems and veins right with my detailing brush required precision I'm still not in full possession of, and my end result is nowhere near as tidy as my inspiration. But it was a fun manicure to do, and the messiness of my lines was not visible in normal wear. I even got a few compliments for this manicure!

Polishes I used:
  • Color Club Lady Holiday - a warm-leaning pale grey crème, opaque in two easy coats. An excellent staple for nail art.
  • Barry M Key Lime Gelly - a saturated warm green crème, fairly thick in consistency and opaque in two coats. Because of its thickness, it can get a bit draggy when it starts to dry. But it's such a beautiful bright green, I cannot hold a grudge against it.
  • Nails Inc Burton Mews - a dark green crème, opaque in two coats and perfect for nail art.

Thanks for looking, and check out other Polish Party manicures below.

Sunday 30 March 2014

FingerFood's Theme Weeks - Monochrome Mother's Day!

This week we have a bumper crop of themes! Due to an overlap between an old and a new set of prompts, I could combine two ideas - one for Mothers' Day and a Monochrome one. Challenge accepted!

Polishes used: Revlon Guest List, Color Club Nouveau Vintage and Sugar Ray, Ciate Cookies & Cream, Nails Inc Langham Place and OPI You Don't Know Jacques

When I was still planning for the single theme of Mothers Day, I decided I wanted to finally try my hand at freehanded vintage roses. I've always loved how they look, and the instructions were simple enough - and so many amazing bloggers posted excellent tutorials! For this manicure, I followed the advice of the incredible Nailasaurus. The addiction of the monochrome prompt forced me to consider a few colour options, and after some deliberation (and a whole lot of polish dots on paper) I chose sepia as my main colour scheme.

Vintage sepia roses and dots.
I started by painting my index and ring fingers with two coats of Color Club Nouveau Vintage - a brown polish with a strong gold and green shimmer. The thumb, middle and pinky were covered with two coats of Color Club Sugar Ray - a pale nude with a fine pink shimmer.

The dots were added with a medium dotting tool. The centre row is Noveau Vintage, the next one outwards is Nails Inc Langham Place, and the out-most row is OPI You Don't Know Jacques. For the roses, I blobbed the Langham Place as the base with the dotting tool, and then added the shadows and highlights with a fine detailing brush from Born Pretty Store using You Don't Know Jacques and Ciate Cookies and Cream. The leaves are the only departure from the sepia tone, but I wanted to add a bit of contrast to the whole design. These were made with the detail brush and Revlon Guest List. After everything was properly dry, I added one coat of Seche Vite.

Vintage roses and dots.
This manicure was surprisingly easy to do. I had practised the drawing technique a few times on a bit of paper, and then recreated it on my nails. Getting the dots even was probably the hardest part of this manicure! I am completely in love with it right now - it looks gorgeous, and I will definitely be adding roses to my nail art arsenal.

Polishes I used: 
  • Revlon Guest List - a muted khaki green crème. A bit runny in application, but it's opaque in two coats.
  • Color Club Nouveau Vintage - a gorgeous multidimensional gold and olive shimmer in a brown base. Opaque in two coats, easy to apply and did I mention it's beautiful?
  • Color Club Sugar Ray - a pale nude with a fine pink shimmer throughout. Opaque in two easy coats, but it dries a bit frosty - not noticeable under nail art, but it would bother me on its own.
  • Ciate Cookies & Cream - a pink-leaning nude crème, transparent and opaque at the same time. A wonderful polish for nail art base, or details.
  • Nails Inc Langham Place - a warm darkish nude crème, nicely opaque and easy to apply.
  • OPI You Don't Know Jacques - the legendary taupe crème, perfect for nail art. On its own opaque in two easy coats, super easy to apply and incredibly versatile.

Thanks for looking, and check out other theme manicures below!

Saturday 29 March 2014

Pahlish The Oldest Question - swatch & review

It seems that Saturdays are now a traditional swatch day here - anything that's been done three times is a tradition, right? This week I want to show you the second Doctor Who inspired polish I ordered from Rainbow Connection UK - The Oldest Question.

Pahlish The Oldest Question - two coats with one coat of Seche Vite and in natural daylight.


The Oldest Question is a medium grey crelly with a beautiful glitter mix - there are numerous small and large copper hexes and a smattering of gold circle pieces. There is also a bit of a copper shimmer throughout the polish. The base is fairly opaque - this is two medium coats - but the glitter is nonetheless nicely visible. The glitter is also very well distributed, there's no fishing or dabbing needed to achieve a great look. It dries a bit uneven, so a generous layer of top coat is needed for a glossy, smooth manicure.

Two coats of The Oldest Question by Pahlish - probably the most colour accurate photo.
This is a gorgeous polish that's super easy to apply and would probably suit most skin tones. If you love grey crellies and glitter, you should definitely go for it.

"The first question — the oldest question in the universe hidden in plain sight. Would you like to know what it is?"
Doctor Who?
Doctor Who?
Doctor.... Who?

Thanks for looking!

Check out what the British Bloggers have been up to this week!


Thursday 27 March 2014

Golden Oldies Thursday - Yellow & Peach

I always seem to be stumped when it comes to GOT prompts. I found two eligible polishes for this week's yellow/peach theme, but then I couldn't think of anything interesting with them. There's only so many dotticures I can do without getting bored.

Barry M Lemon Ice Cream and Seventeen Glisten.

In the end I decided to bring out my striping brush and try something new - a lattice and star-burst pattern. I started with three thick coats of Barry M Lemon Ice Cream - a streaky pastel yellow nightmare. I am so happy I now have a Nails Inc dupe for it... Once that was dry, I freehanded the patterns with a striping brush and Seventeen Glisten. I wish I had used the lattice pattern on all the nails, it looks like a delicious lemon pie!

Polishes I used:
  • Barry M Lemon Ice Cream - a pastel yellow crème and a complete nightmare to apply. It takes between 3-4 careful coats to be opaque, is streaky and uneven. The drying time is reasonable, which is a good thing considering the number of coats needed.
  • Seventeen Glisten - a gorgeous peach base with a strong gold shimmer. On its own opaque in 2-3 coats and very easy to apply. I've been very happy with all Seventeen polishes I own - it's a great budget brand!
Thanks for looking, and check out other GOT manicures below!

Tuesday 25 March 2014

Tri-Polish Tuesdays - March round four!

This week we are saying goodbye to the March colours of green, blue and purple. I will be sad to see them go - but nothing is stopping me from using them in all the other manicures, right? To give them a good send off, I decided on a jelly sandwich dotticure (dotwich?).

Polishes used: Sally Hansen Loyal Lavender, Tiger 62, Barry M SLE2013 Green and OPI Don't Touch My Tutu.
I started with a single coat of OPI Don't Touch My Tutu, and proceeded to dot on the three bright polishes with a large dotting tool. I didn't really go for symmetry or even dots - just full coverage. This part took quite a while, but I usually listen to interesting podcasts while I work on my nails, so I was busy and entertained throughout.

Dotticure sandwich in natural daylight.
Once the dots were all nice and dry I added two thin coats of the sheer white jelly to achieve this faded, milky look. I was considering adding some more dots on top of it, but in the end I decided I like the washed out foggy effect as it is. The whole thing was topped of with a coat of Seche Vite.


Milky and sweet.

The actual colours are a bit more vivid on my nails, and it's really fun to compare the bright, nearly neon bottle colours of my chosen three polishes with the final effect.

Polishes I used:
  • Sally Hansen Loyal Lavender - a subtle lavender shimmer. On its own opaque in three coats, and very pretty on the nail.
  • Tiger 62 - a bright blue crème, slow to dry and fairly opaque. Not bad for £1.
  • Barry M SLE2013 Green - a neon green jelly that was a Superdrug LE colour last year. Very sheer (four coats alone) and streaky alone, but good for nail art.
  • OPI Don't Touch My Tutu - a sheer white jelly, excellent for sandwiches. It would take 3-4 coats to be opaque alone, and it looks like fluffy clouds and marshmallows on the nail.
Thanks for looking, and check out other Tri-Polish manicures below!


Sunday 23 March 2014

FingerFood's Theme Weeks - Freestyle

This week's theme gave us a lot of freedom, so I used it as an excuse to try out a manicure I've been planning for quite a while. I am quite a geek, and recently I've been considering how to make different superhero themed manicures - the colours, layouts and so on. One of the first ones that popped to my mind was a look inspired by Rorschach from Watchmen, the broken, sociopathic vigilante with delusions of righteousness and no qualms about his methods.

Polishes used: OPI Off With Her Red, Nails Inc Hampstead Gardens, Leighton Denny On The Rocks and Hint of Mint, OPI You Don't Know Jacques

I started of with a base of Nails Inc Hampstead Gardens on my pointer, thumb and ring finger, and Leighton Denny Hint of Mint on middle and pinky. The weird mustard shade mirrors the dirty trench-coat Rorschach wears, while the off-white base works great as the background for the mask pattern. I then sponged on some 'dirt' stains with OPI You Don't Know Jacques and Leighton Denny On The Rocks.

Rorschach inspired manicure
 
The black ink spot pattern was done with Misa I Will Survive and a dotting tool - it got a bit messy, and I feel it looks a bit too much like a face, but I guess that's the feature of the Rorschach blots - we see things in them :) The blood spatter was dotted on with OPI Off With Her Red, but next time I might give the proper splatter technique a go. The whole manicure was finished with Orly Matt Top.

I really like how the dirt stains look here.
This manicure was super fun to do and surprisingly easy too! All it required was random sponging and some dotting in a vaguely symmetrical manner.


Polishes I used: 
  • Nails Inc Hampstead Gardens - an amazing weird mustard yellow/brown colour polish, with a crème finish. It's very easy to apply, opaque in two coats and dries slightly darker than the bottle shade. I got in in a Nails Inc lucky dip, and was super happy to see it!
  • Leighton Denny Hint of Mint - off-white crème, leaning towards the greenish-yellow end of white. Opaque in two medium coats, but a bit patchy and uneven. If I were to wear it alone, I would probably give it three coats to be safe. Great shade as a base for nail art. 
  • Leighton Denny On The Rocks - light brown base with subtle shimmer, on its own opaque in two coats.
  • OPI You Don't Know Jacques - beautiful taupe crème, glossy and light. On its own opaque in two coats.
  • OPI Off With Her Red - tomato red crème, nicely opaque (full coverage in two coats) and good for nail art.
  • Misa I Will Survive - super opaque black crème, perfect for nail art or as undies.

Thanks for looking, and check out other freestyle manicures below!


Saturday 22 March 2014

Pahlish - This Song is Ending

Recently I've managed to buy a few polishes from the Pahlish Doctor Who collection at Rainbow Connection. I've been eyeing this collection since it was announced, and I guess many others have as well - when I shopped three hours after the launch, one of the polishes I wanted was already sold out. No worries, though, as I still managed to get my hands on a few beauties!

Pahlish - This Song is Ending with top coat.


Today I will be showing you This Song is Ending - a teal beauty with chunky copper particles. I am a huge lover of teal polishes - along with blue and green these represent over 1/3rd of my stash! Did I hesitate when getting this one? Nah!

Pahlish - This Song is Ending with top coat
The colour of this polish is very saturated and balanced in terms of warm/cool. The copper shimmer seems more visible in the bottle than on the nails, but it's there, and it adds a special spark to this shade. It's definitely a unique polish in my stash!

Pahlish - This Song is Ending


In terms of application, this could be a one coater - it's insanely pigmented - although I went with two coats for the photos. The polish is on the runny side, but it behaves well on the nail and doesn't flood the cuticles. My only issue with the application was that I had were sparse bits of what looked to be unmixed pigment,which ended up as tiny lumps on the nail. I was able to avoid them, or cover them up with top coat, so it's not a huge issue, but still. The drying time was excellent. But beware - this beauty stains! I had doubled up on base coat, and while my nails ended up reasonably unstained, my fingers looked like I had been crushing smurfs with my bare hands, and it took me two days of washing and toothpaste brushing to fully clear my cuticles and fingers.

But how can I hold this against a polish that is named after the goodbye given to the 10th Doctor?


Thanks for looking, and check out what the British Bloggers have been up to this week!


Thursday 20 March 2014

Golden Oldies: Ruffle Manicure (and Ciate Chalkboard review)

This week I had to google what a ruffle manicure was, and when I saw it, I nearly chickened out. I can barely avoid making a huge mess with my nail polish brushes, how am I supposed to apply it like that? After some panicking, I had this awesome idea! I had an untried Ciate Chalkboard kit in my drawer, and surely I could paint some ruffles with the cute pens they provided, right?

Polishes used: Ciate Chalkboard Paint, Mattnificent top coat and chalk pens in Sachel (white), Teacher's Pet (blue) and Recess (yellow).


So, I got on with it - and what a journey this has been! It's only after I finished the manicure that I realised that this set was a fair bit younger than 1 year... A few tired facepalms later, I decided to post this anyway, just to save some of my sanity and for the sake of reviewing this set.

The chalkboard set contains a matte black polish, a matte top coat and four chalk nail art pens in blue, white, yellow and pink. In a previous post I'd mentioned that the matte top coat is only usable with the chalkboard paint - it cracks on any other polish, creating these ugly gashes in the base colour. Well, the matte black polish does the same if applied with a base coat, so remember to leave your nails bare. I actually felt really bad about just painting my nails without that protective coat, but at least this set doesn't stain at all.

Ciate Chalkboard Paint and ruffles added with Recess and Teacher's Pet and a layer of Mattnificent top coat.


The Chalkboard Paint dries almost instantly - the side-effect of this quality is the way this polish will drag horribly if you go over the same spot more than once, and it doesn't level very well. So, you need to apply fast medium coats and wait until the first one is fully dry before adding the second one. After two coats this polish looks amazing - it's deep black and completely matte, with a texture exactly like chalkboard. It's very eye catching, in that deep mysterious black hole way!

Ruffle fail with Ciate Chalkbaord set.

The nail art pens had to be activated by pushing the nib into the container - a process that went well with all but the pink one. For reasons unknown the pink paint just wouldn't flow down to the nib, and in the end I couldn't use it for the manicure at all. They are said to be water soluble, and I certainly found that cuticle clean up was a breeze - just wipe with a damp piece of cotton.

As for their performance - well, just have a look. I can't pretend to be a skilled artist, but these didn't really deliver. The paint coming out  of them seemed a bit watery, and not completely opaque with a single layer over black. The nibs were hard, and left trails through the design. I decided to give a different design a go, just to see if there are some patterns that make the use of these easier.

Ciate Chalkboard Paints alternative design - no topcoat
As you can see, the dots were actually pretty great - but I have dotting tools for this, and I really don't need a set of markers just for that. The flower looks reasonably well, but the nibs were way too wide for proper writing, and the white paint was not opaque enough to look good over black.

The Mattnificent top coat worked well with this set - it's very thin, and glides on well without smudging the designs too much. Too bad it can only be used with the chalkboard base. The good news is that the chalkboard base fares reasonably well under a normal top coat, so I guess I have another black polish in my collection now. The pens seem to work on other polishes quite well, but a typical top coat seems to damage them and cause them to shrink and form gaps in the lines.

Overall, this set was a bit of a disappointment - it's not very versatile, as the polishes and paints can only be used with each other. The pens are easy to use, but the colours are not opaque enough, and seem too watery. Considering the amazing crème polishes Ciate has, I simply expected more from this set.

Thanks for reading, and check out other Golden Oldies below:


Tuesday 18 March 2014

Tri-Polish Tuesdays - March round three!

Polishes used: H&M Lady Luck, Jess Joy and Ciate Pillow Fight
This week's manicure is one of my favourites so far: simple, stripy and in my favourite colours! It wasn't created without some tears, as what you're seeing here is the second version. The first one had a nude background, and more stripes, and was pretty cool until I used an untried matte top coat from Ciate, which promptly cracked all over my manicure and ruined it completely. So, if you do find a bottle of Ciate Mattnificent in a set with their chalkboard paints, never ever use it with any other polish. It just doesn't work.

Anyhow, once I'd recovered from that disaster, I started anew with a different base colour and slightly modified stripe arrangement and colours.

Foil finish stripes over a crème base.

 This time, I used Ciate Pillowfight as my base - it's a gorgeous dusty pale lilac, light and fluffy. Once that had dried, I used a thin striping brush to place stripes of the two foil polishes - green Lady Luck and blue Joy. Both the foils were perfect for painting with, opaque and super smooth. All that was left to do was to topcoat it with Seche Vite.

I love posing with square bottles!
This manicure was super easy to do, and really fun to wear - I got a lot of compliments, and I really enjoyed the contrast between the subdued, classy base and the shiny foil stripes.

Polishes I used:
  • H&M Lady Luck - blue green slightly duochrome foil that sometimes flashes a bit gold. On its own it would be opaque in two thin coats and quite brushstrokey, but it's perfect for nail art.
  • Jess Joy- icy light blue foil that is super shiny, opaque in two coats and easy to apply. An amazing polish for £1.
  • Ciate Pillow Fight - gorgeous dusty greyish lilac crème, elegant and sophisticated. It looks light and almost fluffy on the nails, it applies like a dream and is opaque in two coats - a great feature of such a light polish.
Thanks for looking, and check out other tri-polish manicures below!


Sunday 16 March 2014

FingerFood's Theme Weeks - St Patrick's Day

Polishes used: Sinful Colors Call You Later, OPI Goldeneye, Sally Hansen Ion and NYC High Line Green
While I don't celebrate St Patrick's day, the colours associated with it are my definite favourites - green and gold just go so well together! I decided to use this opportunity to try my hand at a more complex pattern of shamrocks.

Shamrocks and gold - St Patrick's manicure

I started with two coats of Sally Hansen Ion on my accent nail and thumb, and two coats of NYC Highline Green over the rest. On my pinky and pointer, I added a sponged tip gradient of Sinful Colors Call You Later, while on my middle finger I added a lot of dots with OPI Goldeneye, as a sort of representation of a pot of gold. Finally, on my accent finger I created some three-leafed shamrocks with my dotting tool and a fine nail art brush, and added some gold dots between the green leaves. Everything was topcoated with Seche Vite.

The glitter gradient is beautifully sparkly.
The glitter gradient is super sparkly and ornate, and I'm quite happy with the tiny leaves I created, even if they're not the perfect four leafed clovers.


Polishes I used:
  • Sinful Colors Call You Later - a mixture of small and medium glitters in two shades of green, suspended in a clear, runny base. Perfect for sponging on gradients, and very sparkly.
  • OPI Goldeneye - dense flecks of gold in a clear base that could reach full opacity with three coats. My go-to gold for dotting.
  • Sally Hansen Ion - a cool neutral crème, opaque in two easy coats and perfect as a base for nail art.
  • NYC High Line Green - saturated, warm medium green, opaque in a single coat if you're careful. Easy to apply, and fast drying. An amazing budget lacquer!
Thanks for looking, and check out other contributions to this week's theme below! Check out other St Patrick's Day manis here:

Saturday 15 March 2014

Saturday Swatch - ILNP Nostalgia Holographic

Today I want to show you one of my latest polish trophies - my first I Love Nail Polish bottle! I've been pining after the beautiful duochromes from this company for a while now, but being in the UK it's pretty much impossible to get. So, when I saw a few of these beauties being offered on a Facebook swap and sale page, I pounced. And oh wow, I was not disappointed!

ILNP Nostalgia (H) in natural daylight
Nostalgia is an amazing multichrome, that shifts from mauve pink, through orange into bright chartreuse green. This version of Nostalgia has been made even more wonderful with the addition of some holographic dust, so that it flashes all colours of the rainbow in sunlight.

ILNP Nostalgia (H) - a glimpse of the green part of the spectrum.
The sun wasn't fully out when I was taking the pictures, so I wasn't able to fully capture the green end of the shift, but I can assure you it's definitely super bright.

A small sample of the holographic effect on Nostalgia (H)
The holographic effect was particularly visible over the dusky pink shift, and much stronger than I managed to capture.

ILNP Nostalgia was a treat to apply - fully opaque in two coats with no need for black undies, dried very quickly, and there were no brush stroke issues at all. Overall, an amazing polish! I will definitely be keeping my eyes open for more ILNP bottles in the future :)

Thanks for looking!

Thursday 13 March 2014

Golden Oldies Thursday - Purple

Up until this morning, I wasn't sure if I would create a manicure for this prompt - but then I found out the two polishes I had in mind were good for stamping! My MoYou London XL stamper arrived just yesterday, and I spent the entire day stamping away, getting used to the super squishy surface and trying out different polishes. So, how could I resist?

Rimmel Hot List


The base for this manicure is Rimmel Hot List - a dusty purple with a hidden shimmer that only comes out to play in direct sunlight. Incidentally, this is one of the first three polishes I'd ever bought! I must say I was very chuffed with myself when I found out later it's a dupe for Chanel Paradoxal. Nail newbie me had good taste!

Rimmel Hot List
I love this colour - it works very well with my skin tone, and it started my passion for dusty purples.

I then picked up my other oldie Rimmel - Trend Spotting, and stamped over my base with MoYou London Pro Collection 04. Trend Spotting a saturated warm purple with some shimmer visible in the bottle, but never on the nail.

Rimmel Trend Spotting stamped over Rimmel Hot List.
Trend Spotting was very good for stamping - it's slow to dry, and nicely opaque. Any problems with the stamping were due to my limited abilities rather than any issues with the polish or plates. However, it stains the cuticles, so the cleanup is really annoying.

Overall, I like this look - the monochrome stamping is subtle, and the two shades play off each other very well.

Polishes I used:
  • Rimmel Trend Spotting- saturated dark plum purple, opaque in two coats but super slow to fully dry. The pudding-like consistency and slow drying time made it perfect for stamping, since the pattern didn't just fully dry on the plate or the stamper before I managed to transfer it onto my nail. It's sadly a bit of a pain to clean up.
  • Rimmel Hot List - a gorgeous dusty purple with a brighter purple hidden shimmer. Opaque in two easy coats (the wide maxi brush Rimmel has is perfect for my wide nails), but also fairly slow to dry. It would be a great stamping polish over lighter shades!

Thanks for looking, and check out other Golden Oldie manicures below!


Tuesday 11 March 2014

Tri-Polish Tuesdays - March round two!

Polishes used: Nails Inc York Street and Wardour Street, Claire's Shiver and China Glaze Highlight of my Summer (not shown - Stargazer 232).
This week's challenge manicure is clear evidence that reality smashes the best laid out plans. In my manicure planner I had sketched out a beautiful skittle manicure with water marble accent nail - and yesterday evening I sat down to my first ever session of water marbling. Guess how that turned out? I attempted the marble maybe 10 times, but it just wasn't really going anywhere; all I was achieving was a complete mess on my finger and a waste of perfectly good nail polish. In the end, I decided to give it a rest and had to improvise something new today.

Skittle, glitter and stamping - a very spring themed manicure


Since the sun was out again, I felt drawn to the neons and pastels in my stash, and chose three complimenting polishes - lavender, neon mint and light dusty blue. I started by painting my nails with the base colours of my chosen polishes, and then added a coat of the gorgeous glitter topper from Claire's. I really love how it looks over the neon green and the lavender. The whole thing still looked unfinished, so I added some floral stamping with MoYou London Mother Nature 02 plate and my trusty Stargazer 232 silver chrome.

I really like the partial coverage stamping achieved with the full image plate from MoYou London
Because Mother Nature plates are all full pattern ones, I was able to stamp different sections of the floral pattern onto my nails, and have the stamps cover only some of my nail.

I will go back to water marbling one day - I'll try different polishes, and maybe I'll settle for making decals from the dried film rather than dunking my fingers right in. But for now, I acknowledge my defeat :)


Polishes I used:
  • Nails Inc York Street - dusty pale blue crème, opaque in two coats and reasonably quick to dry. A bit patchy on the first coat, but completely self-leveling on the second one.
  • Nails Inc Wardour Street - beautiful lavender crème, super easy to apply and opaque in two coats. My new favourite purple.
  • Claire's Shiver- a glitter topper of white and semi-translucent green hexes in a shimmery base that flashes blue, pink and purple. I wasn't able to fully capture the shimmer in the sunlight over the bright undies - but it's there. This glitter is very easy to apply, dries fast and to a slightly rough finish. Great polish from a budget brand!
  • China Glaze Highlight of my Summer - neon mint crème, much brighter than my photos show it to be. It was a nightmare to apply - patchy, streaky and uneven; needed three coats for full opacity and dried uneven. The glitter and top coat solved most of the problems with the finish, so in the end, it's worth the bother.
  • Stargazer 232 - seriously silver chrome, perfect for stamping.
Thanks for looking, and check out other challenge manicures below!


Sunday 9 March 2014

FingerFood's Theme Weeks - Dots & Stripes

Polishes used: Sinful Colors Thimbleberry, Seventeen Monochrome, Sinful Colors striper, Nails Inc Kensington Mall and OPI Alpine Snow.
This week, the great Finger Food's challenge has rolled to the theme of dots and stripes. I'd been wearing some blues and greens recently, so my mind went straight to the warmer, more tropical end of the spectrum. A quick rummage through my drawers, and a session with my colour planning notepad, and I had a design ready.

Dots and stripes and glitter, oh my!


I started with a single coat of Thimbleberry, and then sponged on a subtle gradient of Kensington Mall. Both are saturated corals, but Thimbleberry is pink based, while Kensington Mall is very much in the orange category.
I added the matte black and white glitter Monochrome over my thumb and ring finger. It has hexes and bars, so it's perfect for the theme. Then, I took my black striper and drew two vertical lines on the edge of my pointer and pinky - I really like the effect, it's bold and doesn't cover the base colour too much. On my middle finger I dotted on OPI Alpine Snow with my largest dotting tool. It looks a bit like fly agaric :) Everything was topped off with a coat of Seche Vite.

Dots and stripes over a gradient - tropical and graphical at the same time!
I am really happy with this skittlette, despite the minor imperfections - it's one of my first ones, and only my second use of the striper pen. I must say that using a nail art sketchbook has helped me with visualising the effect considerably, and I will be using it to plan out my manicures from now on.

Polishes I used:
  • Sinful Colors Thimbleberry - saturated tropical pink-coral crème, opaque in two easy coats and fast drying. This polish applies like a dream and is perfect for nail art.
  • Seventeen Monochrome - a mix of black and white matte hexes in different sizes, with some black bars thrown in. Super easy application, due to the very light base and excellent glitter payoff. An amazing topper from a popular drugstore brand.
  • Sinful Colors striper - black striper, very opaque and manageable.
  • Nails Inc Kensington Mall - a gorgeous super saturated orange coral crème.Opaque in two coats, excellent for gradients, and very easy to apply.
  • OPI Alpine Snow - white crème, perfect for dotting over coloured designs due to the good opacity.
Thanks for looking, and check out other challenge manicures below!

Saturday 8 March 2014

Glitter toppers from AJ Nail Lacquer UK - Swatches & Review


Today is a really exciting day - I get to show you the four hand-made glitter toppers I won from the lovely AJ at Nail Lacquer UK! This is the first giveaway I've ever won, so this makes it doubly exciting for me.

Each of these glitter toppers was hand-mixed by AJ, and is as far as I know, nameless. Hence, I decided to give them nicknames - I needed some names for my swatch sticks, plus, they are too pretty to be nameless :)

All the glitters in this post are layered over two colours of undies, and covered with a thick coat of Color Club top coat.

First off is a mix of large red and smaller pink circle glitters, two sizes of blue hexes and larger holographic hexes that I dubbed Rule Britannia.

Rule Brittania - my first circle glitter!
I swatched it over Sally Hansen Gray by Gray and Misa I Will Survive to show off how it looks over a lighter and a darker base. The circles requires some fishing, and the base was quite goopy so much dabbing was required to get the glitter placement in some semblance of order.

Rule Britannia over Sally Hansen Gray by Gray and Misa I Will Survive
As you can see, I had some issues with bubbling due to the dabbing, and even a generous layer of top coat didn't fully combat the lumpiness caused by the thick base. I have since added a few drops of polish thinner to it, and it's behaving much better. This polish looks so much better in real life than on these photos - especially over black, where all the glitter holo goodness comes alive.


The next polish is a complex mix of neon glitters in a lightly orange tinted base, and I named it Sunshine and Daffodils. Large and small yellow-green and orange hexes, blue squares, pink hexes - it has it all. I have a feeling that the orange tint was due to the orange hexes losing colour, as I encountered some super thin colourless hexes in the base.

Sunshine and Daffodils over Nails Inc Bolton Place and Notting Hill Carnival
I swatched it over taupe rather than a darker shade, since some of the glitter pieces looked a bit transparent, and I have to say this glitter is a great way of livening up nude shades. I added an accent nail in pale yellow to show how the base tints the nail polish. Unfortunately, this means it won't work very well with cool-toned undies.

Sunshine and Daffodils - I love neon glitters
This polish was much easier to apply, and while some dabbing was still needed, it was much more amenable to my placement efforts.


Now we're getting to my two favourites. Candy Bunnies is a matte mix of small grey hexes, pink squares and rhombuses and white circles, stars and hearts. I love it.

Candy Bunnies over Nails Inc Wardour Street and OPI Nein Nein Nein OK Fine.
The application was easy - after a shake the glitter required no fishing at all, and the base is very manageable. I still got some bubbling, because I tried to spread the glitter more evenly (which required some dabbing), but in the end, it was totally worth it. Look at all the shapes!

Candy Bunnies - my first stars and hearts glitter!
I like it equally over the light (Nails Inc Wardour Street) and dark base (OPI Nein Nein Nein OK Fine), and my only regret is that I won it after Valentine's :D


The final glitter mix is my favourite one, and I am wearing it as I type this post. I named it Thicket, because it's packed with everything. I counted three sizes of matte black hexes, two sizes of blue, red, silver holo and green hexes, some orange squares and white hexes - and I may have missed a few shapes or colours, since some of my nails have a single glitter piece in a new colour.

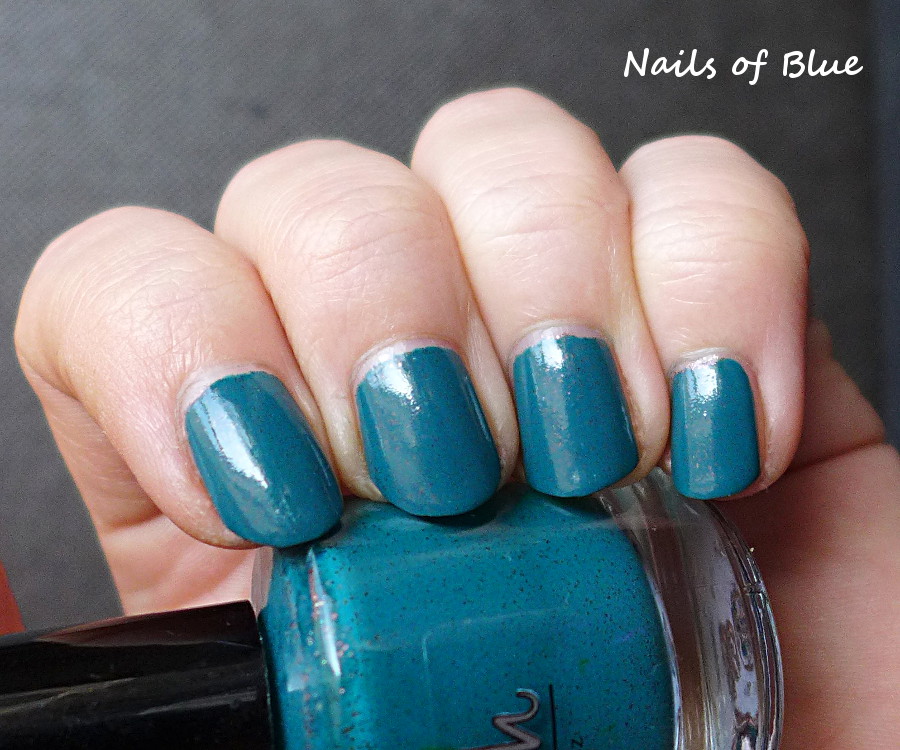
Thicket over Sinful Colors Be Happy and Nails Inc Burton Mews
The sun came out for this swatch! Then it was gone literally 10 minutes later... I layered it over a minty shimmer Sinful Colors Be Happy, and a dark green Nails Inc Burton Mews to show off how it looks over different undies. This glitter applies like a dream, each no dabbing required, and the payoff is incredible.

Thicket - look at the holo sparkles!
 This glitter is simply perfection. In the end, I added a matte topcoat and ran around the flat excitedly, showing off the pretty, pretty glitter to my friends.

Thicket with a matte top coat.


Overall, these glitters are pretty amazing, and I am incredibly grateful to AJ for mixing them up for the giveaway. I came out of this swatching session happy with the glitters, and also convinced that good placement of large glitters is obviously a skill gained by making pacts with the devil. I may head to my nearest crossroads soon, but in the meantime I will consider using a sponging technique to help with some of the thicker bases.


Thanks for looking!